







How to Start a School Makerspace With a Laser Cutting Machine
Starting a school makerspace with a laser cutting machine is all about getting four main factors right: safety, machine selection, ventilation, and an optimal workflow for the students.
Keep in mind that the objective of starting a school makerspace is not just to teach students how to operate a laser cutting machine. It should be to create a hands-on learning environment where students develop creativity, critical thinking, problem-solving skills, and practical knowledge by designing and making real-world projects.
So, what do you need to start a school makerspace with a laser cutting machine, and how should you go about it?

5 Essentials You Need to Start a School Makerspace
You do not need a collection of machines to start a school makerspace. A small, well-organized makerspace with the right laser cutting machine can support a wide range of educational projects. Here are the essentials:
-
A laser cutting and engraving machine: This will be your primary equipment for cutting shapes, engraving designs, and producing physical objects from digital files. A CO2 laser cutter is generally a versatile starting point for school applications.
-
A computer and design software: The students will need access to computers and compatible software for creating digital designs. Look for beginner-friendly programs that support vector graphics and simple 2D design. Most of these (Inkscape, Cuttle.xyz, Fusion 360, etc.) are free.
-
Ventilation and exhaust systems: You will need to install an appropriate exhaust system that safely directs emissions outdoors or ( if it is permitted) use properly designed filtration equipment like an air purifier for laser engravers.
-
A dedicated workspace: You need a dedicated area with sufficient room for the machine, computers, worktables, material storage, and student collaboration.
-
Safety equipment: Include appropriate fire extinguishers, fire detection, emergency shutoffs, protective equipment where required, and clear operating procedures.
-
Materials and accessories: You must also stock approved materials such as plywood, acrylic, cardboard, and paper. Measuring tools, cutting mats, storage containers, and cleaning supplies will also very likely be needed.
Important Note!
Remember that a laser cutter should be installed and operated according to its manufacturer's safety requirements and applicable school regulations. Students should never operate the machine unattended, and younger learners should work with it under direct adult supervision.
How to Start a School Makerspace in 5 Steps
Once you have identified all the basic requirements you need, the next step, naturally, is to begin planning your makerspace. Here are five steps that will help you move from initial preparation to completing your first student project.
Step 1: Establish Your Educational Goals and Prepare the Space
Before purchasing equipment, you must have a clear understanding of what you want the makerspace to be and what you want the students to be able to learn there. This is very important because your educational goals will influence everything from the equipment you purchase to the materials you stock and the projects you introduce.
Remember, not all school makerspaces are the same: goals vary depending on the age/level of students using them, and what they will be learning. School makerspaces can be made to:
-
introduce elementary students to basic geometry and creative design
-
help middle school students understand engineering principles.
-
allow high school students to explore product design and digital fabrication.
Next, identify a suitable room or section of the school. Ideally, it should have sufficient space for the laser cutter, computers, worktables, and material storage. The MIT Edgerton Center recommends that the overall Makerspace should be about 60 ft² per student. So, for a classroom of 25 students, for example, this is 1,500 ft², or a room 30 x 50, or a space double the size of a typical classroom
Also, pay particular attention to ventilation, electrical requirements, fire safety, and access control. The machine should be positioned in an area where teachers can supervise its operation without obstructing other activities.
Step 2: Choose the Right Laser Cutting Machine
For most school makerspaces and STEM classrooms, a CO2 laser cutter is the best option because it offers the best balance of material versatility, speed, safety integration, and educational accessibility. In other words, a CO2 laser cutter is most likely to cut and engrave commonly used educational materials (wood, acrylic, cardboard, and paper), provide the right speed, have all the safety features you need, be easy for students to learn, and be affordable enough to fit into the school's budget.
Consider the following when choosing a CO2 laser cutter for a school makerspace:
-
The laser power: Choose sufficient power for your intended materials and projects without unnecessarily investing in industrial-level equipment. Lower-to-moderate wattage (e.g., 30W–60W CO2) handles common school materials (cardboard, 2mm–3mm plywood, acrylic, leather) much better and more safely than industrial-strength high-power (90W+) tubes.
-
The size of the working area: The larger the work area, the better. For a desktop CO2 laser cutter, you want a workspace of about 20.1" × 11.8". For a freestanding cabinet CO2 laser cutter, you need a bigger workspace, about 20" x 28".
-
Safety features: Make sure the machine comes with all the features for safe operation: an enclosed design, safety interlocks, emergency stops, and appropriate fire protection.
-
Software compatibility: Ensure the machine works with the best laser engraving software (especially LightBurn) and supports common laser engraving file formats (SVG especially).
-
Ease of operation: Choose a laser engraver that teachers can learn to operate, configure, and maintain without extensive technical experience.
Pro Tip
Also consider the manufacturer's training resources, warranty, and after-sales support. Laser engraving manufacturers often offer special programs for educators. OMTech’s Education Program helps schools in the US deliver hands-on learning, industry-relevant skills, and measurable outcomes with safe, classroom-ready laser engravers. The program offers laser engravers for educators at discounted prices and with associated services.

Step 3: Install the Machine and Establish Safety Procedures
Have the machine installed according to the manufacturer's instructions, ensuring that its electrical connections, ventilation, exhaust system, and other requirements are properly addressed.
Before allowing students to participate in projects, teachers and designated staff should receive appropriate operating and safety training. Establish clear rules covering:
-
Who is authorized to operate the laser cutter.
-
Which materials are approved for cutting and engraving.
-
How students submit designs for processing.
-
What to do in an emergency.
-
How to inspect, clean, and maintain the machine.
One important rule is to prohibit all materials that aren ot suitable for laser cutting, like PVC, vinyl, and unidentified materials. Some of these release highly hazardous gases or corrosive substances when laser processed. Never assume a material is safe simply because it is sold for crafting.
Also, the room or the machine's power switch must be locked/secured so students cannot use it unsupervised.
For younger students, it is generally best to have teachers handle the actual machine operation while students concentrate on designing and developing their projects.
Step 4: Introduce Students to Digital Design and Laser Cutting
Before attempting complicated projects, introduce students to the basics of digital fabrication.
You can incorporate LightBurn into your curriculum and begin with simple design exercises using beginner-friendly software. Teach students how to create basic shapes, arrange objects, add text, and prepare designs for cutting or engraving.
You can then explain the difference between laser cutting and laser engraving.
-
Laser cutting uses the laser beam to cut through a material and produce individual shapes or components.
-
Laser engraving uses the laser to mark or remove material from its surface to create text, patterns, images, and other designs.
Give students opportunities to experiment with simple designs before progressing to more complicated projects.
If the students already know tools like Tinkercad, transition them using vector-based workflows (exporting DXF, SVG, or AI files)
This stage is particularly important because it helps students understand that laser fabrication involves more than operating a machine. They must also consider measurements, material properties, design limitations, and how individual components fit together.
Step 5: Complete Your First Makerspace Project
For your first project, choose something relatively simple that encourages creativity without requiring complicated designs or extensive machine operation. The key is to small and fast to build confidence and manage throughput.
For example, students could design personalized nameplates, wooden bookmarks, geometric puzzles, or small architectural models.
A simple project could follow this process:
-
Introduce the project and explain what students are expected to create.
-
Ask students to sketch their ideas and discuss possible designs.
-
Help them translate their sketches into digital designs.
-
Review the designs for dimensions, material suitability, and cutting requirements.
-
Have a trained teacher operate the laser cutter to produce the components.
-
Allow students to assemble, decorate, and evaluate their finished projects.
After completing the project, encourage students to discuss what worked, what could be improved, and how they might approach the design differently next time.
You can find inspiration and practical starter project ideas through the Secondary School Maker Space Guide.
Explore 10 DIY laser projects you can easily teach students in a classroom
Tips for Choosing a Laser Engraver for a School Makerspace
Not all laser cutters are equally suitable for educational environments. For a school makerspace, you want a laser engraving machine that best fits the age of your students, the types of projects you want to introduce, and your available budget. To narrow down your options and choose the best laser for your school mkaerspce, you need to ask yourself two main questions:
-
What type of laser cutter do I need?
-
Which model best serves the specific needs of the group of students I want to teach?
1. Understand the Different Types of Laser Engravers
For a school makerspace, CO2 Laser cutters are generally much more preferred than diode laser engravers and fiber laser engravers. The main reason for this is versatility: they can cut and engrave a variety of nonmetallic materials, including wood, acrylic, cardboard, and paper, which makes them more suited to r projects involving model construction, architectural designs, puzzles, signage, and engineering prototypes.
An enclosed CO2 machine with appropriate safety interlocks and ventilation is generally a strong choice for a permanent school makerspace.
Diode Laser Engravers are more affordable and compact than CO2 alternatives, and they can also cut or engrave many kinds of material. However, many diode machines have limited cutting capacity and slower processing speeds. The most affordable ones are also open-frame designs, which are less suitable for unsupervised classroom environments.
Fiber lasers are primarily designed for marking and engraving metals and certain plastics. In a makerspace, they can be great for industrial and technical applications, but they don't have the versatility required in a school makerspace focusing on creative projects, model making, and introductory engineering.
2. Match the Machine to Your Students' Age Groups
The age and experience of your students should influence your equipment selection and how the laser cutter is introduced.
|
Grade Level |
Recommended Approach |
Suitable Projects |
|
Elementary School (Grades K–5) |
Teacher-operated, enclosed CO2 or diode laser |
Nameplates, simple puzzles, bookmarks, and basic geometric shapes |
|
Middle School (Grades 6–8) |
Teacher-supervised CO2 laser with beginner-friendly design software |
Architectural models, customized signs, mechanical models, and STEM kits |
|
High School (Grades 9–12) |
More versatile CO2 laser with a larger working area and greater cutting capacity |
Engineering prototypes, product design, robotics components, and advanced models |
|
College and Technical Education |
Higher-capacity CO2 systems and specialized equipment where appropriate |
Product development, engineering prototypes, fabrication, and advanced design projects |
OMTech Polar CO2 Laser Cutters For School Makerspaces
OMTech's Polar series covers every stage of a school laser program, from first projects to engineering prototypes.
Elementary (K-5): Polar Lite.
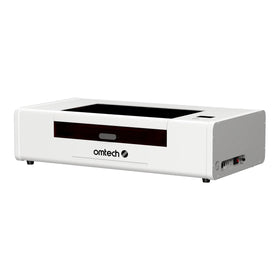
The OMTech Polar Lite CO2 Laser Cutter is perfect for elementary schools where the projects are simple and do not require a lot of power. It is fully enclosed, has autofocus to speed up setup, and is the most affordable machine in the lineup. It is a great machine for elementary school laser cutting projects like nameplates, bookmarks, and simple shapes.
Middle school (6-8): Polar S.
The OMTech Polar S 55W Desktop CO2 Laser Engraver is great for middle school makerspaces because it is designed to make supervised learning easier. Its 16MP camera will show students exactly where a design will land on the material, and autofocus removes a common beginner mistake. An emergency stop and flame alarm add the safety you need in a classroom, and the 23.6 x 12 in bed has room for architectural models, signs, and STEM kits.
High school (9-12): Polar S (70W glass).
The OMTech Polar S CO2 Laser Cutter is also a great option for high school makerspaces where older students need more space and more cutting power. It has a 28 x 14 in work area and cuts thicker wood and acrylic, up to 18 mm and 20 mm in OMTech's demos. A rotary attachment is included for cylindrical parts, and the fully enclosed, Class I design with safety interlocks suits a busy classroom.
College and technical programs: Polar 2 (50W RF).
For college makerspaces, the OMTech Polar 2 with RF tube is the best option. The RF tube engraves at up to 2,000 mm/s with fine detail and is rated for up to 30,000 hours of tube life. It's also air-cooled, so there's no water loop to maintain. That makes it a good fit for shared labs where students use the machine all day. Programs moving into heavy fabrication can step up to OMTech's larger systems.
 Final Thoughts
Starting a school makerspace with a laser cutting machine is an excellent way to make learning more interactive, practical, and engaging. It gives students opportunities to explore STEM concepts, develop digital design skills, experiment with materials, and turn their ideas into tangible projects.
However, the success of a school makerspace depends on more than the equipment you purchase. You need clear educational objectives, an appropriate workspace, trained staff, effective safety procedures, and projects that match your students' abilities.
Start with a manageable setup, introduce simple projects, and gradually expand your equipment and activities as students develop their skills.
Ultimately, the goal is to create an environment where students are encouraged to ask questions, experiment, make mistakes, and discover what they can create. With the right planning and a suitable laser cutting machine, a school makerspace can become an important part of how students learn, collaborate, and prepare for the future.