







How to Engrave Tumblers With a Laser (Setup, Testing, and Common Coating Problems)
The first tumbler most people engrave comes out wrong in one of three ways. The text climbs across the cup. One side is darker than the other. Or it looks fine on Friday and the coating starts flaking by Tuesday.
Almost none of it is the machine's fault. It's the rotary setup and the numbers you fed the software. Get those two right and powder-coated cups become the most repeatable product in your shop.
Here's what to run on a CO2 laser engraver or cutter in the 50–60W range, how to test it before it costs you a customer's order, and what to do about the coating problems that turn up a few days later.
What You Need Before the First Cup
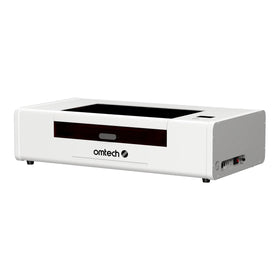
- A CO2 laser in the 50–60W range. A desktop RF machine like the OMTech Polar 2 (50W RF version) handles this all day and ships with a rotary in the box; the same model also comes as a 70W glass tube version, which needs different power numbers.
- A rotary that matches your cup size and shape. The CO2 laser rotary attachments range covers 0.2 to 6 inch diameters depending on style. Pick by the blanks you actually sell, not by the one cup on your desk. Which style to buy, and what each one is bad at, is in the table below.
- Powder-coated blanks. CO2 light doesn't mark bare stainless. It burns the coating off and exposes the metal underneath. Bare steel tumblers need fiber or a marking spray.
- Calipers, a spirit level, 91% isopropyl alcohol, and a melamine sponge (Magic Eraser or equivalent).
- Masking tape, if stray-energy scorching shows up on your blanks.
Two Rotary Styles, and Which One Your Cup Needs
| Spec | Four-wheel roller | Jaw chuck |
|---|---|---|
| Model | LRA-GL49-00 four-wheel rotary | LRA-KP58-00 jaw chuck rotary |
| How it holds the cup | The barrel rests on two pairs of rollers; friction turns the cup as they spin. | Three jaws clamp one end; the cup turns on that axis and hangs free at the other end. |
| Fits | 2–14 in length, 0.4–6 in diameter | 0.2–3.1 in diameter |
| Best for | Straight and tapered drinkware, full wraps, heavy 30oz blanks | Lids, rings, pen barrels, small or irregular cylindrical parts |
| Where it lets you down | Rollers can slip at high speed on heavy or heavily tapered blanks, which shows up as wavy text. | Long or heavy cups droop at the unsupported end, so focus drifts along the design. |
The difference matters more than the spec list, so picture the geometry. On a roller rotary the cup lies horizontally across the rollers and the lens works on the top of the barrel. The two contact lines sit underneath, out of the beam, but they are still pressing on the coating. On a chuck the cup cantilevers out sideways from the jaws, so the end nearest the chuck is rigid and the far end is not. That single difference explains most focus and slippage complaints.
Full specs are on each product page. Check the diameter range against the blanks you actually sell, not the one cup on your desk.

Set Up the Rotary in LightBurn, in This Order
- Level the rollers. Same height both sides, frame level in both axes. Check it with a spirit level. Eyeballing is how climbing text starts.
- Measure the blank, not the cup in the photo. Take the diameter at the engraving line with calipers. A 20oz skinny blank and a tapered travel mug are different jobs, and the rotary table above tells you which style can hold which.
- Enter it in LightBurn's rotary setup. Set the rotary type (roller or chuck) and the mm per rotation, then verify with a small test square. If the square comes out stretched or squashed, the circumference number is wrong.
- Focus on the contact line. Focus where the beam actually lands, which is the top of the curve.
- Run a wrap test. One line of text on a cheap blank or the back of the cup. Two minutes here saves a customer's order.
- Tension the rollers or tighten the jaws. On rollers, tight enough that the cup can't slip, loose enough that it isn't deformed. On a chuck, clamp on a part of the cup that stays inside the finished piece.
Settings, and How to Test Them Before They Cost You an Order
These are a working window for powder-coated blanks on a 50–60W CO2, not a spec sheet. Coating thickness varies by brand. A premium blank and a craft-store blank behave differently at the same numbers, which is why the test below matters more than the table.
| Parameter | Working window | Why |
|---|---|---|
| Power | 15–30% | Glass tubes have a firing threshold around 10–15% and won't fire below it; RF tubes fire lower. Above 30% you start overheating the steel under the coating. |
| Speed | 100–350 mm/s | 300–350 mm/s is normal on lighter blanks. Heavy or tapered cups slip above roughly 250 mm/s, which is where wavy text comes from. Tension and roller grip decide the ceiling. |
| Passes | 1–2 | Two light passes beat one scorched pass. |
| DPI / Line Interval | 254 DPI (0.1mm) to 400 DPI (0.06mm) | Denser intervals concentrate heat; paired with high power or low speed they raise the risk of peeling days later. |
| Overscan | 2–3% | Stops the stutter mark at the start and end of each scan line. |
The Four-Square Test
Take one scrap blank of the brand you're about to run and engrave four 20mm squares at four combinations: 15% / 350 mm/s, 20% / 300, 25% / 250, 30% / 200. Pick the one with the color you want and the least heat. Then leave the blank on a shelf for 48 hours and look again. The square that still looks the same is your starting point for that brand. Write the numbers on the cup with a marker and keep it next to the machine. It takes fifteen minutes and replaces every settings table on the internet, including this one.
Two adjustment rules worth taping to the wall. If the mark is dark or blotchy, raise speed before dropping power. Power affects the coating bond more than speed does. If the edges look blurry or a halo appears, raise speed toward 350 mm/s before touching anything else.

The Coating Problems That Show Up Later
Text climbing or coming out wavy
Slippage, almost every time. The cup is rotating faster than the motor can hold, the rollers aren't level, or the circumference number is off. Slow down, re-level, then re-measure. It's rarely the design file.
Uneven darkness across the design
Your focus is off the contact line, or the cup is tapered. On tapered tumblers, focus on the line where the design sits and keep the design narrow enough to stay inside the depth of field. Wide art on a heavily tapered cup fades at the edges no matter what you do.
Coating peeling days later
Heat input, in three forms: power too high, speed too slow, or line interval so tight the beam keeps re-entering the same strip of coating. Heat conducts sideways and weakens the coating's grip around the mark. Lower the power, open the interval to 0.1mm, and check the result 48 hours after engraving before you ship.
Brown halo, and how to tell which kind you have
Not every halo is the same problem, and the fix differs.
- Scorching beside the design (brown or black edges from stray energy): tape the surface with masking tape before engraving and peel it after. The tape absorbs the stray energy.
- Brown discoloration on exposed metal: usually oxidation, not burnt coating. A low-power cleaning pass over the mark often fixes it better than more tape or less power.
Cheap test first: re-run the same file at the same settings on a scrap blank with tape, and compare.
Clean-Up Is Part of the Process, Not an Extra Step
After the laser stops, the engraved area is covered in carbonized coating residue. It looks gray and dull, and beginners read that as "the laser didn't cut deep enough" and crank the power up on the next cup. Don't.
Scrub the mark with 91% isopropyl alcohol and a melamine sponge. The bright metal shows up in seconds. Wear gloves. Skin oils settle into a fresh mark and darken it over time. Work in a ventilated area away from any ignition source; high-concentration IPA flashes off fast and the vapour is flammable.

Tapered Tumblers and the Honest Trade-Off
Straight 20oz skinny tumblers are beginner-friendly. Tapered cups look better on a shelf and are harder. The surface curves away from focus, so wide designs fade at the edges. A four-wheel rotary handles the taper better than a chuck, but no attachment fixes a design that's too wide for the curve. Keep designs short and centered, or quote full-wrap work as a trial run rather than a finished product.
If You Plan to Sell Them
Tumbler work is repeat business: teams, weddings, corporate gifts, fundraisers. Check what local makers charge before quoting. Pricing varies widely by region and audience, and underquoting is the fastest way to make this product line unprofitable.
Operationally, once your settings card is dialed in for a given blank, time per cup drops to minutes. That's what makes small orders worth taking. If you're testing the business before committing to a production machine, the Polar Lite 55W is the cheaper entry point. Step up when order volume makes the extra speed pay for itself.
The Last Check Before a Cup Goes in the Box
Rotate the finished cup slowly under a lamp and look at two places. Both are on the outside of the cup, and both are easy to miss if you only look at the design head-on.
The closing seam. A wrap design starts at one point on the circumference and comes back around to it, so somewhere on the cup the first scan line and the last one meet. If the circumference you entered in LightBurn is off by a fraction of a millimetre, that join shows as a thin strip of untouched coating, or as a slightly darker band where the two passes overlap. It's usually on the back of the cup. Find it before your customer does. If you can see it, re-measure the diameter and re-run.
The roller band. The rollers that drove the cup were pressing on the coating the whole time they were turning it. On thick or soft powder coat they can leave a dull, slightly polished line exactly where they sat. It's outside the design, which is why it gets missed, and on a matte blank it's the most visible defect on the finished piece.
Then pack accordingly: set each cup in its slot with the seam and the roller band facing up, toward the lid, so nothing presses on them and nothing rubs across the mark in transit. Paper or a thin foam sheet between stacked cups. One cup per slot if the order is going by courier.

Before Your Next Order
Build your settings card. Then build the business.
Engrave one blank from each brand you stock, write power, speed and line interval on the cup with a marker, and keep that card next to the machine. If text still climbs at the higher speeds, the problem is in the mounting, not the file.
Explore the Polar Series →If you're still choosing a machine, start from the Polar series desktop CO2 lasers rather than a single model. The right one depends on whether you're doing five cups a week or fifty a day.