


How to Make Wooden Signs with a Laser Cutter (Step-by-Step)
Laser-cut wood signs are one of the biggest and boldest projects you can make with a laser machine. Ideal for customizing your personal spaces or for selling on your website, creating professional-looking wood signs is a great way to get into the home decor or small business niche.

With a CO2 laser engraver, you can make wood signs with crisp cuts, smooth edges, and deep engravings—all with just a few clicks. Plus, it’s incredibly satisfying to watch your design come to life in real time. In this guide, we’ll show you how to make your own wood signs using a laser cutter from start to finish.
Materials & Tools You’ll Need for Laser-Cut Wood Signs
To complete your laser-cut sign project, gather the following supplies:
-
Laser-compatible wood (e.g., 1/8" plywood or MDF)
-
CO2 laser engraver (like an OMTech model)
-
LightBurn software or compatible design program
-
SVG/vector file of your design
-
3M double-sided tape or wood glue
-
Tweezers (for small letters or shapes)
-
Baby wipes or soft cloth
-
Paint or stain (optional for finishing)
How to Make Wooden Signs
Step 1: Design Your Sign
Start with a great idea. Design your wood sign in vector editing software like LightBurn, Inkscape, or Adobe Illustrator. You can also download free SVG files online or purchase them from marketplaces.
Tips for the design process:
-
Use different colors in your file to distinguish between engraving and cutting paths.
-
Create score lines for outlines or to mark where to place layered elements.
-
Make sure your artwork fits the dimensions of your wood piece.
Convert all text to paths or outlines to ensure compatibility, and save your file as an SVG or DXF format before importing it into your laser software.
Step 2: Prep the Wood
Before you load your wood into the laser, prep it:
-
Apply 3M double-sided tape on the back of any parts that will be mounted to a backer board. This makes the assembly easier.
-
Consider masking your wood with transfer tape or painter’s tape to reduce burn marks.
-
Ensure the wood is flat and clean—warping can interfere with laser focus and alignment.
Place the wood flat on the honeycomb bed and align it with your laser’s origin point.
Step 3: Cut and Engrave

Now comes the fun part. Import your design into LightBurn and adjust your settings according to your machine’s wattage and the wood thickness.
-
Engrave first, then cut. Cutting can cause slight movement, which could misalign the engraving.
-
Use recommended settings (for example, for a 60W OMTech laser: 200mm/s at 30% power for engraving, and 10mm/s at 90% power for cutting 3mm plywood).
-
Use the frame preview to confirm alignment before starting.
Run a test job on scrap wood if you’re unsure about your settings.
Step 4: Clean, Color, and Detail
Once your job is done, remove the wood from the bed and clean it up:
-
Use baby wipes or a cloth to remove soot or burn residue.
-
Paint letters or shapes if desired, using acrylic paints or paint pens.
-
Let all pieces dry completely before assembly.
Adding color or wood stain can really elevate the final look of your sign—especially for gifts or commercial sales.
Step 5: Assemble the Sign

With your pieces engraved, cut, and cleaned, it's time to build your sign.
-
Peel off the backing from your 3M tape or apply glue to the back of your cutouts.
-
Align carefully using the etched guides or score lines on the backer board.
-
Press firmly to secure.
You’ve now created a custom wood sign that’s perfect for hanging, gifting, or selling.
Display and Gifting Ideas
Depending on the sign’s size and purpose, you can display or present it in various ways:
-
Hang it using rope, twine, or sawtooth hangers.
-
Prop it on a small wooden easel.
-
Package it in eco-friendly wrapping or custom gift boxes for added flair.
Personalized signs make thoughtful gifts for weddings, birthdays, new babies, or homewarming celebrations.
Extra Tips for Success
To make your laser-cutting workflow more efficient and professional:
-
Keep your lenses and mirrors clean for better precision.
-
Save your successful cut settings for future reference.
-
Invest in higher-quality plywood to reduce voids or uneven cuts.
-
Use jigs if producing in batches for consistent placement.
Also, remember to follow all safety precautions, including eye protection and proper ventilation.
Why Laser-Cut Wood Signs Are Worth the Effort
Laser-cut signs allow you to create professional-looking projects with minimal tools and training. With one machine and a bit of creativity, you can:
-
Start a small business selling custom décor.
-
Add a personal touch to gifts and events.
-
Make functional signage for classrooms, weddings, and craft fairs.
Signs are high-demand products, and since wood is affordable and easy to work with, your profit margins can be significant.
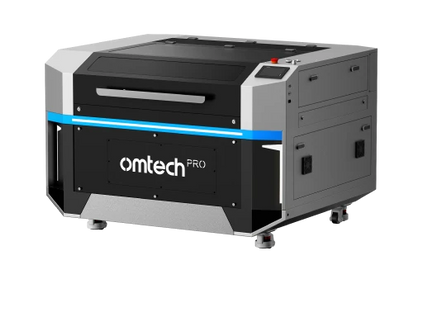
Why Choose OMTech Laser Engravers

When it comes to making wood signs, OMTech CO2 laser engravers are a perfect fit. Whether you’re a hobbyist or a small business owner, OMTech machines offer:
-
Reliable performance with precise laser output
-
Power options for cutting thin to thick wood (40W–150W)
-
User-friendly design with passthrough doors and safety features
-
Affordable pricing with strong community support
-
Compatibility with LightBurn software
Popular models like the OMTech Polar Lite are ideal for hobbyists with limited space, while larger machines like the OMTech Pronto are built for production environments with bigger workloads and faster speeds. Check out this blog to discover the differences between the OMTech CO2 laser series.
 Wood projects by OMTech users
Whether you're making your first sign or scaling up a sign-making business, OMTech provides the tools to make it happen.
Craft With Purpose
Creating your own laser-cut wood signs is more than a creative outlet—it’s a practical and profitable skill that opens the door to countless opportunities. From birthday gifts to business logos, nursery name signs to farmhouse-style quotes, the possibilities are as wide as your imagination.
Laser engraving takes traditional woodworking to the next level, blending artistry with precision and efficiency. With just a little practice, you’ll be turning out crisp, clean, and customized wood signs that anyone would be proud to hang on their wall.
Ready to get started? Explore OMTech’s full lineup of CO2 laser engravers and discover how easy it is to turn your ideas into beautifully crafted signs today.


