How to Embroider on Knitting: A Complete Guide

Embroidering on knitted fabrics might seem like a delicate challenge, but with the proper techniques and tools, creating stunning, textured designs becomes a rewarding opportunity. Whether you're embellishing jumpers, scarves, beanies, or cardigans, machine embroidery on knits lets you add custom flair to everyday garments.
But machine embroidery on knitting comes with a learning curve. Knitwear is typically a flexible, stretchy material, which means it doesn’t behave the same way as stable cotton or woven fabric. You need to carefully manage hoop tension, design choice, and stabilisation to ensure your stitches remain smooth and secure, even as the fabric stretches and moves.
In this article, we’ll explore how to successfully embroider on knitting with your embroidery machine. We’ll cover key materials, stabiliser selection, hooping tips, machine settings, and more—plus a few pointers on hand embroidery for knitters who prefer to go manual.
Why Embroider on Knitted Garments?
Knitted garments, whether hand-knitted or factory-made, offer a soft, warm, and flexible base. Adding embroidery transforms these everyday basics into eye-catching, custom pieces. From monograms on beanies to floral motifs on sweaters, embroidery enhances the handmade look and lets you personalise your knitwear for gifts, fashion, or retail.
The Challenge of Knit Fabric
Knits are made by looping yarns, giving them stretch and recovery. While this makes them comfortable to wear, it also makes them tricky to embroider. If you stitch on knits without adjusting for their stretchiness, your design might pucker, warp, or sink into the fabric.
To avoid this, keep three rules in mind:
-
Stabilize properly to reduce movement
-
Avoid overstretching the fabric in the hoop
-
Use suitable embroidery designs that won’t distort with the fabric’s give
How to Embroider on Knitting
Materials You’ll Need
Before you start, gather these essentials:
-
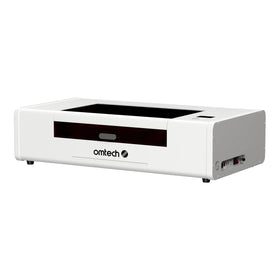
OMTech embroidery machine
-
Tear-away or cut-away stabiliser
-
Water-soluble topping stabiliser (optional but helpful)
-
Embroidery thread (polyester or rayon)
-
Embroidery needle (ballpoint recommended for knits)
-
Embroidery hoop or magnetic frame
Step 1: Choose the Right Design
Knitwear isn’t ideal for dense, complex designs. Heavy stitch counts can stretch the fabric and cause distortion. Instead, opt for:
-
Light-density designs
-
Open fill patterns
-
Appliqué-style motifs
-
Lettering with clear, thick strokes
Tip: Avoid tiny text or intricate details, especially on chunky knits.
Step 2: Select Your Stabiliser
Stabilisers are key to successful machine embroidery on stretchy fabric.
Cut-Away Stabiliser
-
Best for stretchy knits, like jumpers or t-shirts
-
Offers strong, long-term support
-
Won’t tear or distort during washing
Tear-Away Stabiliser
-
Good for stable knits, like sweatshirt fleece
-
Easier to remove, but less support
Water-Soluble Topping (Optional)
-
Prevents stitches from sinking into bulky or fuzzy knits
-
Especially helpful for terry cloth, beanies, or ribbed knits
Sandwich the knit between the stabiliser and topping (if used), and you’ll get much cleaner results.
Step 3: Hooping Your Knitwear
Hooping is one of the most important parts of embroidery on knits. Here's how to do it right:
-
Don’t overstretch the fabric. Let it lie naturally in the hoop. If it’s stretched during hooping, it’ll pucker when released.
-
Use magnetic or soft-edge hoops for thicker knits to avoid hoop burns.
-
Ensure the stabiliser is taut and smooth under the fabric.
-
If possible, hoop both the stabiliser and fabric together—this improves stability during stitching.
Tip: For tricky items like beanies, you may prefer floating the fabric by hooping just the stabiliser and using spray adhesive or basting stitches.
Step 4: Choose the Right Needle & Thread
Knitwear is soft, so your needle should be too. Use a ballpoint embroidery needle, which gently pushes through loops without damaging the yarns.
For thread, polyester is ideal for stretch, durability, and wash resistance. Rayon is also suitable if the garment won’t be laundered heavily.
Step 5: Adjust Machine Settings
With your OMTech embroidery machine, small adjustments make a big difference:
-
Lower the machine speed slightly for extra precision
-
Use a looser tension setting to reduce puckering
-
Watch the first few stitches closely for any shifting or pulling
Once you've done a test stitch, you can adjust accordingly.
Step 6: Start Stitching
After everything is set up:
-
Run a test design on scrap knit material to check tension and density
-
Begin your main project, monitoring the stitching closely
-
Once done, remove the hoop gently and trim stabiliser edges (don’t pull!)
For cut-away stabilisers, trim close to the edge, but leave enough to support the stitches.
Optional: Hand Embroidery on Knits
While this guide focuses on machine embroidery, it’s worth noting that hand embroidery on knitting is still widely practiced. It involves stitching directly into finished garments using darning needles and embroidery floss or yarn. Popular hand stitches include chain stitch, satin stitch, and French knots—especially great for adding embellishments to chunky cardigans or handmade jumpers.

However, for scale, speed, and consistency, machine embroidery offers unmatched efficiency—especially for those producing gifts, retail items, or merchandise.
Cleaning and Caring for Embroidered Knitwear
After embroidering:
-
Use gentle detergents for washing
-
Avoid wringing or twisting the garment
-
Air-dry flat to maintain shape
-
For extra protection, turn garments inside out before washing
Machine embroidery, when done properly, holds up well over time, even on stretchy fabrics.
Common Problems & Fixes
|
Problem |
Cause |
Solution |
|
Puckering |
Fabric stretched too tightly |
Hoop more loosely; reduce tension |
|
Sinking stitches |
Fuzzy or ribbed knit surface |
Use water-soluble topping |
|
Thread breakage |
Wrong needle or thread |
Switch to ballpoint needle; check thread |
|
Design distortion |
Too dense design or poor stabilisation |
Use open designs and cut-away stabiliser |
Final Thoughts
Embroidery on knitting doesn’t have to be intimidating. With a bit of preparation and the right tools, you can customise hats, jumpers, scarves, and more with beautiful machine-stitched designs. Use the proper stabiliser, avoid overstretching, and select designs made for knitwear—and you’ll be producing high-quality embroidery in no time.


