


Combining 3D Printing and UV Printing for Durable Graphics

3D printing has changed the way we prototype and manufacture custom parts. From professional designers to hobby makers, anyone with access to a 3D printer can conceptualize and execute their projects.
When it comes to adding full-color graphics or labels to these parts, however, traditional 3D printing can fall short. Multicolor printing requires more parts and more time, driving up cost and prolonging production. This is where UV printing comes in: offering full-color, durable graphics at a quicker and cost-effective rate.
In this article, we’ll discuss how to combine 3D printing and UV printing to add vibrant patterns and designs to your 3D parts. We’ll talk about the advantages of UV printing over multifilament printing and how it works with UV printers like the OMTech Spectra.
Why UV Printing Complements 3D Printing
UV printing uses ultraviolet-curable inks that cure instantly when exposed to UV light. This means the ink dries to the touch immediately, forming a durable, scratch-resistant bond with the substrate. This instant cure is a major advantage over traditional printing systems, which may require long drying times or risk smudging during handling.
On a 3D printed surface, UV printing delivers high-resolution imagery with sharp edges and vibrant colors, even on rugged or textured plastics. Because the inks cure instantly, secondary processing—like sanding or handling—can begin immediately after printing without fear of smearing or distortions.
For many makers, this combination offers a powerful alternative to purchasing expensive multicolor filaments and running complicated multi-extruder prints. Large amounts of color filament can be costly and difficult to manage, especially when only small areas of a part need color or graphics. UV printing bypasses these limitations by applying graphics after the 3D print is complete.
How It Works: A Step-by-Step Workflow
3D Print Your Part
Start by 3D printing your object with your preferred material and method—FDM, SLA, SLS, or others. Most rigid materials like PLA, ABS, PETG, and nylon can serve as a good base for UV printing.
Tip: Leave a flat or gently curved surface where you plan to apply UV graphics, as flatbed UV printers work best on stable surfaces.
Prepare the Surface
Depending on your material, you may lightly clean or prep the surface to promote adhesion. A mild wipe to remove dust or oils is usually sufficient for most thermoplastics.
Send to a UV Printer
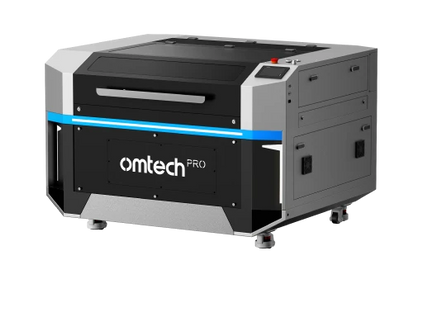
Once the part is ready, load it onto a UV printer like the OMTech Spectra. These printers apply ink using inkjet technology and cure it instantly with powerful UV lamps as the printhead moves over the part. High-quality printers like the Spectra also use vacuum beds, which are ideal for aligning and holding materials during the printing process.
Because UV printing cures ink on contact, you gain immediate durability with excellent abrasion resistance—ideal for labels or functional markings that see daily use or handling.
Add Graphics, Text, or Labels
UV printing lets you add full-color logos and images, manufacturing labels and barcodes, instructional or safety text, texture effects; spot varnish, and raised elements. All of this can be done without changing your 3D printer setup, saving time and expense—especially when only a small area needs decoration.
Advantages Over Multicolor Filament Printing
Multicolor extrusion printing requires either a multi-extruder setup or frequent filament swaps. Both approaches increase complexity and cost. Filament spools in multiple colors are expensive, and frequent changes interrupt prints and lengthen production time.
In contrast, using a dedicated UV printer to decorate a finished 3D part lets you work with standard filament for the structure and rely on UV inks for color and detail. This approach is particularly effective for manufacturing-style labels that need to be clear and long-lasting, branding and serial numbers on functional parts, or small runs or custom orders where filament changes would be inefficient.
Because UV inks cure instantly, you also eliminate downtime waiting for ink to dry, enabling faster turnaround between printing and finishing. Durability is another key advantage. UV-cured inks create a durable surface layer that resists scratching, moisture, and daily wear—properties that many filament-based color prints struggle to achieve.
Practical Applications Across Industries
The combination of 3D printing and UV printing opens doors to many applications. It’s not just about decorative flair; it’s about functional, industrial-grade graphics that help machines and products work better in real environments.
In product prototyping, UV printing lets designers visualize final branding and packaging directly on prototypes. In manufacturing, it’s used to add serial numbers, part IDs, and assembly instructions directly to 3D printed components. In medical modeling, controlled text and color coding help differentiate parts or indicate safety information. In consumer products, UV graphics bring color and personality to 3D printed toys, custom gadgets, and promotional items.
Because UV ink technology is broadly compatible with many materials—not just plastics—it also supports printing on metals, glass, or composites if the part geometry allows it.
A Cost-Effective Workflow for Custom Graphics
UV printing adds value without adding undue cost. Rather than buying a wide palette of filament just to incorporate color into 3D prints, you can print the part in a single base material, then decorate it with UV printing afterward. This significantly reduces material costs and simplifies workflow.
Instant curing also cuts out waiting time, enabling faster production cycles. There’s no need for post-drying, and because the ink adheres strongly, finished parts are ready for packaging or assembly right away.
Better Graphics Without the Hassle
Combining 3D printing with UV printing is a smart strategy for creators who want durable, full-color graphics on functional parts without the complexity and cost of multicolor filament printing. UV printing delivers vibrant, scratch-resistant results, cures instantly, and integrates seamlessly into production workflows that require speed and reliability.
If you’re ready to add professional graphics to your 3D printed parts with precision and efficiency, a UV printer can be the perfect addition to your toolkit.
Bring your 3D prints to life with full-color, durable graphics from the OMTech Spectra UV Printer. The Spectra delivers high-resolution UV printing with instant curing and industry-ready durability. Explore the OMTech Spectra and take your 3D printed products to the next level.


