Embroidery Ideas for Beginners: Stitches, Designs & More

Diving into machine embroidery is exciting, but knowing where to start can feel overwhelming. For those just beginning, choosing the right types of stitches and simple project ideas helps build confidence and skill. In this guide, we’ll walk you through basic machine embroidery stitches and share curated embroidery ideas for beginners that let you practice while creating something beautiful.
Types of Machine Embroidery Stitches
Modern embroidery machines support several stitch types, each with unique characteristics and best uses. Here's a breakdown:
1. Satin Stitch
-
What It Does: Produces smooth, tight, shiny lines perfect for text or outlines
-
Best For: Monograms, lettering, borders, small decorative shapes
2. Fill Stitch (Tatami or Step Stitch)
-
What It Does: Creates a solid stitched area using rows of thread; can vary in density
-
Best For: Filling larger areas with colour—like backgrounds, animals, or larger shapes
3. Running Stitch
-
What It Does: A single line of stitching—appears like hand embroidery
-
Best For: Simple outlines, delicate details, or minimalistic patterns
4. Triple Stitch
-
What It Does: Each stitch is repeated three times for reinforcement
-
Best For: Designs that need durability, like seams or appliqué borders
5. Decorative Stitches
-
What It Does: Patterned stitches like scallops, zigzags, or waves
-
Best For: Adding flair to borders, hems, or as standalone motifs
6. Appliqué Stitches
-
What It Does: Combines satin and running stitches to attach fabric shapes
-
Best For: Bold shapes, patches, or layered designs
These stitches offer a solid foundation for most beginner embroidery projects. As you get comfortable, you can begin mixing stitch types creatively to craft unique effects.
Embroidery Ideas for Beginners
Here are some easy-to-stitch beginner embroidery ideas to try:
-
Monogram Initials (satin stitch) on tote bags or pillowcases

-
Heart or Star Icons (fill stitch) on T-shirts or accessories
-
Simple Line Art (running stitch) of flowers, outlines, or words
-
Name Tags (satin and running stitch combo) for personalising gear
-
Animal Silhouettes (fill stitch) on sweatshirts or onesies
-
Geometric Designs (running or decorative stitch) like diamonds or circles

-
Border Trim Patterns (decorative stitch) on kitchen linens or towels
-
Simple Appliqué Shapes (appliqué stitch) like hearts, stars, or letters
-
Tiny Floral Sprays (satin and fill) on napkins or scarves

-
Textured Seams (triple stitch) on bags or hems for extra reinforcement
-
Fruit Icons (fill stitch) on aprons, napkins, or tea towels
-
Animal Tracks (running stitch) like paw prints or bird feet on hats or bags
-
Birthday Numbers (satin stitch) with balloons or candles on kids’ shirts

-
Mini Cactus or Succulents (fill and satin stitch) on coasters or zipper pouches
-
Shapes (satin or outline stitch) like triangles, circles, or hexagons on placemats

-
“Made By Me” Labels (running and satin stitch combo) on quilts or clothing tags
-
Minimal Landscapes (running stitch) of mountains, sunrises, or trees on patches
-
Bow Ties or Glasses Icons (fill stitch) on baby onesies or bibs
-
Sewing Tools (outline stitch) like needles or thread spools on cases or holders
-
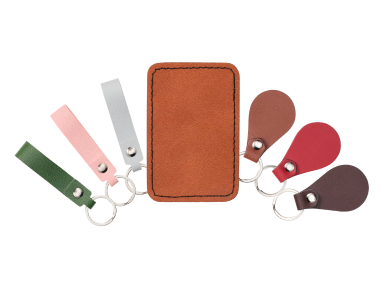
Initial Zipper Pulls (satin stitch) on felt or leather tags for backpacks or jackets
These projects help you practice various stitches, thread types, and machine settings—without overwhelming detail or complexity.
Tips for Setting Up Beginner Embroidery Projects
To get the most from your first stitches:
-
Use a stabiliser appropriate for your fabric (tear-away or cut-away) to reduce puckering
-
Hoop without tension, especially on soft materials—hooping too tight can cause distortion when released
-
Test designs on scrap fabric before embroidering your final piece
-
Use a ballpoint or universal needle depending on the fabric type
-
Match thread colour to your design and consider sheen types (polyester vs rayon)
Planning ahead ensures your simple projects produce polished, professional-looking results.
Common Mistakes & How to Avoid Them
|
Mistake |
Cause |
Fix |
|
Thread breaks |
Wrong tension, old or poor thread |
Adjust tension, use quality thread |
|
Design puckering |
Fabric stretched in hoop |
Hoop fabric naturally, use stabiliser |
|
Blurred or fuzzy stitches |
Low density or wrong stitch choice |
Use satin for outlines, fill for deep blocks |
|
Skipped stitches |
Incorrect needle or tacky stabiliser |
Use fresh needle and proper backing |
|
Colour bleeding |
Improper stabilisation or finish |
Use correct wash settings or spray |
Why Good Machine + Good Ideas Make Great Results

Starting with simple embroidery ideas is one of the best ways to build confidence and develop strong fundamentals. By practicing common stitches like satin, fill, and running stitch on approachable projects—such as monograms, patches, and small accessories—you’ll quickly gain a feel for design placement, tension control, and fabric handling. As your skills improve, those same beginner techniques become the foundation for more detailed and professional-looking embroidery.
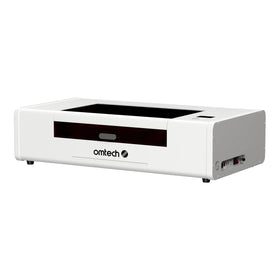
When you’re ready to move beyond entry-level projects or want a machine that can grow with you, the OMTech Pulse 15-needle commercial embroidery machine offers a powerful next step. With automatic color changes, a large embroidery area, and support for flat, garment, and cap embroidery, the Pulse makes it easier to handle multi-color designs, repeat projects efficiently, and maintain consistent stitch quality. Features like intuitive touchscreen controls and thread-break detection help beginners work with confidence while providing the performance needed for more advanced designs and small-scale production.
Whether you’re just learning your first stitches or planning to turn your embroidery ideas into custom products, OMTech has the tools to support your journey. Explore the OMTech Pulse today and discover how OMTech embroidery machines can help you create cleaner stitches, tackle bigger projects, and bring your embroidery ideas to life with precision and ease.


